Thursday, March 24, 2016

Sideloading Deb Files without a Jailbreak

Required Programs: (Click the name to download)

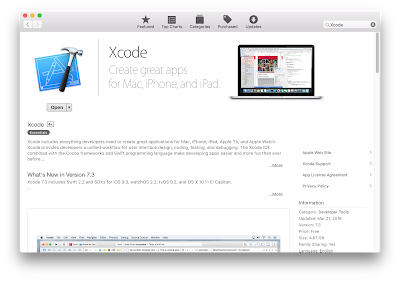
Xcode - Mac App Store
iOS App Signer - Google Drive

Compatibility (Comment your results):

Incompatible: CydiaWinterboard (loads, but doesn't function), iCleaner (use xCleaner), Activator,
Compatible: Kodi, FluxProvenance, NDS4iOS, GBA4iOS 2.0, Happy Chick, Moviebox, MAME4iOS, iTransmission, xCleaner, iDos, iSSB, AppFlix, Jungle Video Downloader, etc.
Semi-compatible: Filza, Retroarch (incomplete filesystem access), Flex (patches don't work)

You can only sideload deb files that are applications, not tweaks. As of now, the applications side loaded have to work within the iOS sandbox, so apps like Kodi, Filza, and Retroarch work, but cannot navigate the entire filesystem like on a jailbroken device. The usefulness is limited

Download Xcode from the Mac App Store or Apple Developer website. Then download the iOS App Signer program from the required program link at the top of the guide.

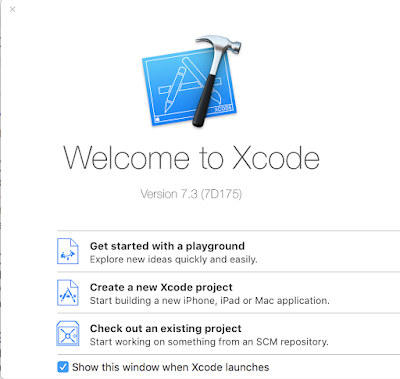
Click Create a new Xcode project

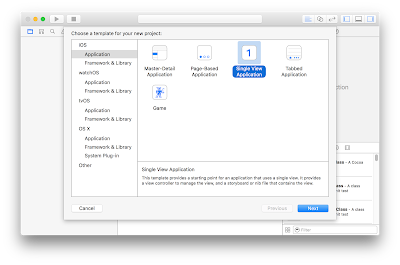
Press Next once Single View Application is selected 
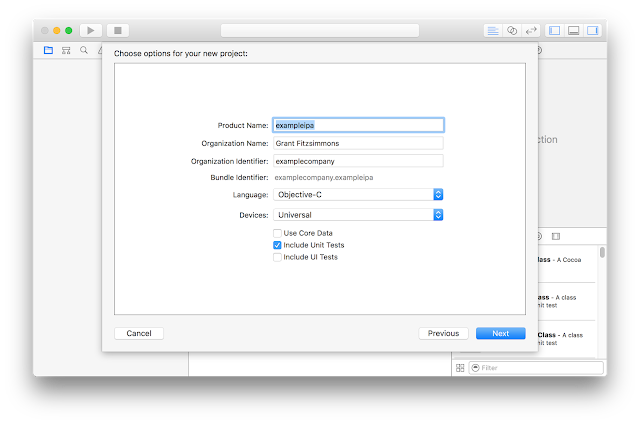
Name the Product Name anything you want, and the Organization Identifier anything you want as well 
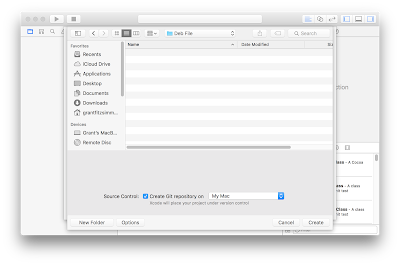
Navigate to wherever you want to store the app's folder. It does not matter where it is located.
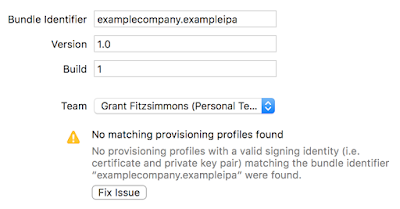
Click Fix Issue to resolve the profiles issue. You may have to log in with your iCloud.
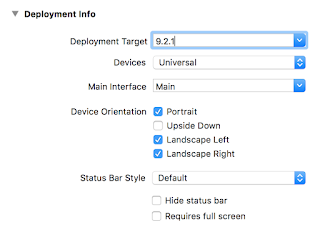
Set the Deployment Target for whatever iOS version you want to install it on. You can now minimize Xcode.
Download the deb file you want to install. I'm using a Kodi deb
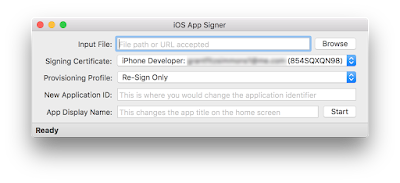
Click Browse and navigate to your .deb file
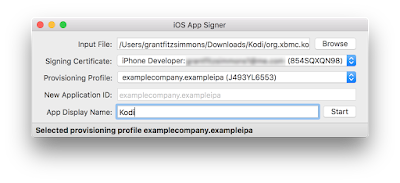
I've selected the Kodi deb, but there are many others you can try.
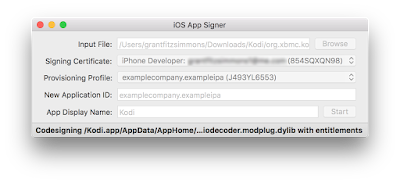
Select the Provisioning Profile you made in Xcode and type the name you wish to be displayed on your device in the App Display Name section. Then press Start.
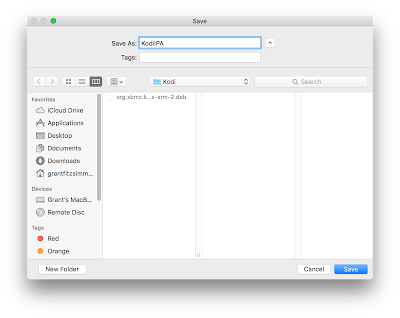
Save the .ipa file to a location you can remember.
It should run some text at the bottom and stop when it is complete.


Now open Xcode again and click Window on the finder bar, and then go to Devices.

Navigate to the device you plugged in via USB in the left column

Click the + sign in the Installed Apps section

Navigate to the .ipa file you created with the 


Once Xcode finishes, it should be on your device!


Please remember, not all deb files are compatible with stock iOS, or even jailbroken iOS. Comment with what worked and what didn't below! Tweaks are not compatible with stock iOS.


Share This:    Facebook Twitter Google

Wednesday, March 23, 2016

OS X - Enabling TRIM on Non-Apple

Enable TRIM for Non-Apple SSDs

TRIM is similar to defragmenting a hard drive, and Apple does not enable this by default in 3rd party SSDs. It is not clear why they do not, but probably because they would rather have you use theirs. In any case, if you would like to keep your SSD healthy, all you have to do is use Terminal with a command.

1. Open Terminal and copy and paste this into it:

sudo trimforce enable

2. Hit enter, and follow the prompts by pressing Y and enter each time.

3. It will reboot automatically, and you should be done!

It is that simple. Leave a comment if you have any questions!
Share This:    Facebook Twitter Google

Enable HiDPI Resolutions on macOS

Enable HiDPI Resolutions on macOS

Works on OS X El Capitan 10.11+

Enabling HiDPI resolutions allows your display to run at full resolution but render the images at a smaller one. In a sense, it works like the Retina displays by scaling windows and programs to appear larger than normal. It is essentially the same as the scaling option in Windows, and it default in OS X Retina Displays. If you happen to 1440p or 4K screen, this can come in handy. This works at any resolution, but isn't useful below those resolutions.

BEFORE YOU START: Disable SIP (System Integrity Protection) on macOS

Method 1: Terminal

If you don't want to download anything and understand how to use Terminal, it is very simple. Open Terminal from Launchpad or Spotlight and copy the following command into it and press enter:

sudo defaults write /Library/Preferences/com.apple.windowserver.plist DisplayResolutionEnabled -bool true
 Method 2: Quartz Debug

Quartz Debug gives you many more features, such as an FPS counter and other visual modifiers. You can try it out by downloading the file from Google Drive. This option is for people who would rather be able to disable and reenable it at ease.

Download - QuartzDebug.zip


There you have it! HiDPI is enabled!
Share This:    Facebook Twitter Google

Thursday, March 10, 2016

Install CloudReady by Neverware

Install CloudReady by Neverware

Alternatively: Install Chromium OS from ArnoldTheBat (Open Source)

CloudReady by Neverware is a branch of Chromium OS. Neverware has compiled an easy to use, quick to set up edition for home users for free. Unlike ArnoldTheBat's edition of Chromium OS, CloudReady can cost money depending on the edition you wish to use. This tutorial is for the home users, and it is much simpler to set up compared to ArnoldTheBat's fork. 

1. Visit http://www.neverware.com/freedownload
2. A file named something along the lines of cloudready-free-46.1.20.bin.zip should have downloaded. It is a few hundred megabytes, so be patient.


3. Go to the Chrome Web Store with Google Chrome and download Chromebook Recovery Utility. This is necessary to create a bootable USB.
4. Run the Chromebook Recovery Utility from Chrome. This works on any platform supported by Google Chrome.


5. Click the gear in the top right near the X and press "Use local image" and select the cloudready-free-46.1.20.bin.zip file that was downloaded and then choose the USB you want to put CloudReady on. Let it finish creating the recovery media, and unplug it.


6. Plug it into the computer you want to install CloudReady on. Reboot and press the boot menu key.

Note: If you're having issues accessing the boot menu, follow a guide for your specific computer. If you have a UEFI BIOS on a laptop, follow this guide.

7. Select the USB drive CloudReady was copied on to.

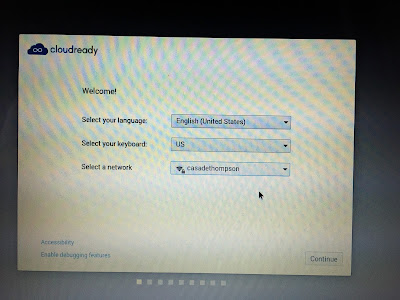
8.  In this case, I'm using an old HP laptop. The screen does not look fantastic on camera, but I wanted it to be authentic.
The CloudReady boot logo. If you see this, you are good to go.
You need to select your WiFi network first. If WiFi is not supported out of the box, you probably should not continue. 
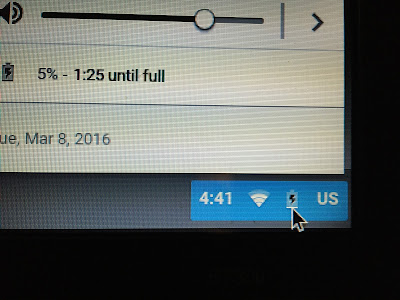
Click on the time button in the bottom right corner.
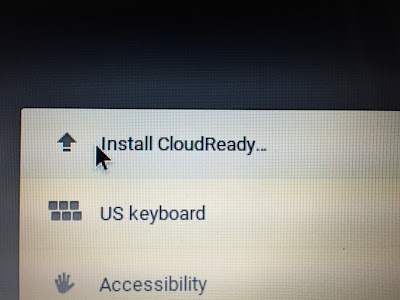
At the top of the menu Install CloudReady should appear.
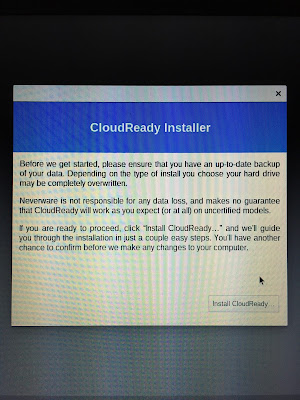
Click Install CloudReady... when the window appears.
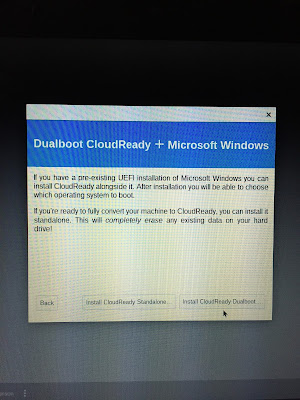
Here you get the option of installing CloudReady alongside Windows.

If you want Windows: Press Install CloudReady Dualboot...
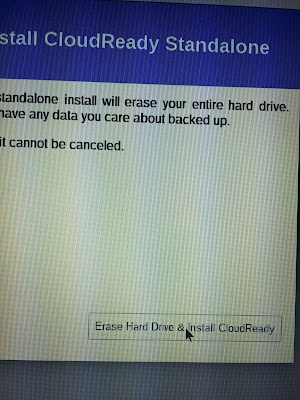
If you want to remove Windows and only use CloudReady: Install CloudReady Standalone...

For this old laptop, I am erasing the hard drive completely. If you are dual booting, continue on.
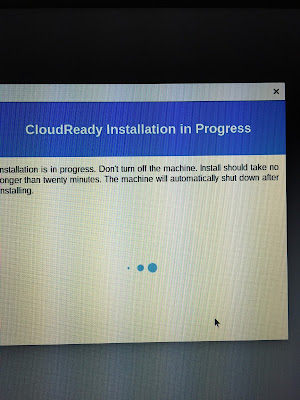
It will take about twenty minutes. It will automatically shut down when it has completed.
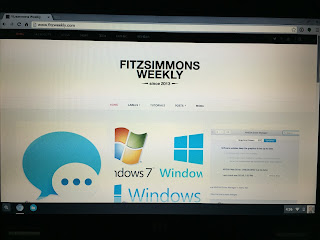


The installation is complete! Have fun with Chromium OS!
Share This:    Facebook Twitter Google

How To Access The Boot Menu

Boot Menu Instructions

A PowerEdge T710 BIOS splash screen
Above is a picture of a typical BIOS splash screen. It should list the key you need to press somewhere either along the top or bottom. The key you need to press is the Boot Manager, Boot Menu, Boot Options, or Boot Selection key. Sometimes it may be a key for more options, and in that case press it first.

Lenovo Laptops:

  1. Press F12 while the computer is booting (when the Lenovo logo is present)
  2. Move the selection with the arrow keys and press enter to select the boot option
Dell Laptops:
  1. Press F12 while the computer is booting (when the Dell logo is present)
  2. Move the selection with the arrow keys and press enter to select the boot option
HP Laptops:
  1. Press F9 while the computer is booting (when the HP logo is present)
  2. Move the selection with the arrow keys and press enter to select the boot option
Apple Laptops:
  1. Hold the option key while the Apple logo is shown after turning on the computer
  2. Use the trackpad or arrow keys to select a boot option
Most PCs:
  1. Press F12, F9, F2, or Esc while the PC is booting (Searching your computers name followed by "boot menu" should get you the exact boot menu key)
  2. Use the arrow keys and press enter on the selected boot option
Comment what key worked for you with your specific motherboard/computer manufacturer!
Share This:    Facebook Twitter Google

Wednesday, March 2, 2016

Download Any Windows ISO (7+) from Microsoft

Download Every Windows 7-10 ISO directly from Microsoft

Microsoft used to have official downloads for Windows 7, 8, and 8.1, but they have all-but deleted any trace of them from their websites. WZor and Nummer, two well-known Windows hackers have created a piece of code that can be copied into your browser to download Windows ISO files straight from Microsoft. The only things you need are a web browser (in this tutorial, Chrome or Firefox) and an internet connection. Go to the Windows 10 ISO website and press Ctrl+Shift+J on Chrome or Ctrl+Shift+K on Firefox. Then copy the PasteBin code into the window that appears, and press enter.

PasteBin Code


Other GuideCreate a Bootable Windows 10 USB
(Works with Windows 7 and above)

How To Download the ISO Files

Copy the PasteBin Code


Press Ctrl+Shift+J on Chrome, and paste it in the window that appears. (Ctrl+Shift+K on Firefox)
Press Enter.
Credits:
  • TechFleece's original article on the topic
  • WZor and Nummer for writing the code to make it possible
EDIT: PasteBin updated to have a cleaner-looking result. If you want the original, it is linked here.

Share This:    Facebook Twitter Google