Tuesday, November 8, 2016

How to Export an Xcode Project to an IPA file

Xcode to IPA Tutorial

Video Tutorial - YouTube

With Xcode, it is not always simple to export your project to an IPA format. First and foremost, the project must built successfully, and able to be run in the iOS simulator program.

1. Click Product on the Finder bar and then click Archive. It will process for a little while but then a window should appear with your Archives available.


Share This:    Facebook Twitter Google

Sunday, November 6, 2016

How to get the Touch Bar on any Mac (and iPad)


A developer on GitHub, bikkelbroeders, has created an app for any Mac running macOS Sierra 10.12.1 or above that adds the new Touch Bar from the 2016 MacBook Pro digitally to macOS.

Download macOS Sierra 10.12.1 update - Apple.com

They have also made an iPad app that allows the Touch Bar to be used via a USB connection. It functions identically to a physical Touch Bar as it uses the exact same software, however, it won't allow you to use your iPad's Touch ID sensor to unlock your Mac.

1. Download the TouchBarServer.zip file from the GitHub link.


2. Extract the zip file and open TouchBarServer.app.


3. Click the small play button near the top right of the Finder bar and make sure there is a check mark  next to On-Screen Touch Bar (Press Fn to Show).


4. Press the Fn key (function key) on your keyboard and the Touch Bar simulator will appear directly below where your cursor is located. Press it once again to hide it.


Now you have a virtual Touch Bar on any Mac running macOS 10.12.1 or later!


Optional steps:

Use the Touch Bar from your iPad through USB

This process will have to be repeated every 7 days if you do not have a developer account through Apple or no access to an iOS sideloading subscription service such as IPAStore.

1. Download the Xcode Project file to compile it yourself to your device or download the one I've pre-compiled and follow this guide.

TouchBarClient.ipa - Google Drive download link - Version 1.0 (latest as of November 6, 2016)
GitHub - Self-compile the IPA file - Latest version

2. Download Cydia Impactor from cydiaimpactor.com and place it in your Applications folder.

3. Open Impactor from your Applications and plug in your iPad. The name of your device should appear in the top dropdown menu.

5. Drag the IPA file you downloaded earlier to the section that says Install SuperSU (aka, root my Android).

6. Enter your Apple ID information to sign the application and it will be placed on your device.


7. The app should now be ready to launch. Once again, click the play button on the Finder bar and make sure Allow iOS Touch Bar Clients is checked.

8. Open the Touch Bar application on your iPad. The Touch Bar should now appear at the bottom of your iPad's display.


On the 9.7 inch and above iPad models this should be very functional, however, the large gray space above has no function with this version.

Hope you enjoy this interesting Touch Bar demo on your Mac and iPad! Leave a comment if you have any issues or questions.

Thanks a lot to bikkelbroeders for developing this incredible piece of software and iOS companion app.
Share This:    Facebook Twitter Google

Friday, November 4, 2016

Malwarebytes for Mac Instructions

  Malwarebytes Anti-Malware for Mac is a fantastic utility that I recommend to any Mac owner that suspects that a virus, adware, or spyware is floating around their computer. The download to this tool is not available from Malwarebytes home page, however, it is regularly updated and free for personal use. For anyone who needs instructions on how to use this piece of software, here's your guide.

1. Download Malwarebytes Anti-Malware. Go to the download link below and it should automatically begin downloading.

DOWNLOAD - Malwarebytes Mac

2. Click the downloads button in the top right of Safari. From here, double click the downloaded DMG file, it should say something like MBAM-Mac-X.X.X.dmg, and in this case, it is version 1.2.5, so it is MBAM-Mac-1.2.5.dmg.


3.  Drag Malwarebytes Anti-Malware into your Applications folder.

4. Open Malwarebytes Anti-Malware inside your Applications folder, using Spotlight, or Launchpad.


5. Click Scan and it will search your Mac for malware. 

If the following message is displayed, it cannot find any threats. For more help, you can press the What to do if your problem was not solved text or continue and press Close.


If malware is found, allow it to delete anything it finds.

You've completely scanned your Mac using Malwarebytes Anti-Malware! You can use this app anytime to make sure your copy of macOS is clean. Comment if you have any other issue this was unable to solve on your Mac. Good luck!
Share This:    Facebook Twitter Google

Thursday, October 27, 2016

Apple's Continuity Crisis

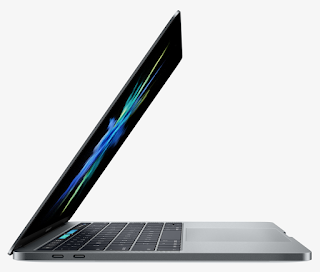
The new 13-inch MacBook Pro with Touch Bar and Touch ID

Apple announced the new MacBook Pro today with an impressive new design, feature-set, and the first Thunderbolt 3 connector on any Mac so far. However, many questionable choices were also made when the new base model's US cost is $1,499 opposed to the previous years price of $1,299. 

I. Colors
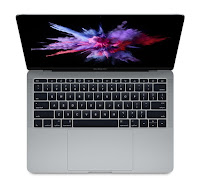

The new MacBook Pro features two color options, Space Gray and Silver. The iPhone 7 no longer has the Space Gray color choice, instead going for a matte black color instead. This immediately separates the products, whereas when the standard MacBook was announced in 2015 the iPhone 6 came in the same colors. This constant design continuity was a nice touch to compliment Apple products lying side by side. Hopefully a matte black MacBook Pro is released next year, however, I do not see this being probable due to the slow nature of Mac hardware updates in the previous 3 years.

II. Cables


The MacBook Pro 2016 baseline model features only 3 ports, 2 Thunderbolt 3 (USB-C) ports and a single 3.5mm headphone jack. 

iPhone Compatibility:

The iPhone 7 removed the headphone jack and left behind a single proprietary connector, the Apple Lighting port. Companies producing a lightning cord must pay licensing fees to Apple, meaning the removal of a 3.5mm headphone jack will place a lot of money into their pockets, not to mention the deterrence from switching to a rival due to the incompatibility of headphones. The MacBook Pro retains this headphone jack and has no Apple Lightning port. Not only this, but also lacks the standard USB port that the iPhone's in-box charger needs.
What this means is your iPhone 7's headphones cannot be used with any Mac and you cannot charge your iPhone 7 without of an adapter using Apple's included cord.
USB-C:

Adapters are everywhere. Apple sells a countless number of adapters and standard 2015-2016 MacBook users have lived with this reality for a while now. The MacBook Pro comes with a USB-C to USB-C charging cord and an 85W power brick to USB-C. No more MagSafe 2, and that is a big deal to many Mac users.


If you use your Mac for things like extracting images from an SD card or plugging in your iPhone to your laptop, you will be paying extra for adapters and specialized cables. Just for a single standard USB port, you will shell out $19 USD for an adapter. To charger your lightning iOS device, you will pay $25 USD for a regular cord. A USB-C to SD card adapter will cost you around $30 USD. On the brighter side, however, you can charge your laptop from any of the USB-C ports and charge from a compatible portable battery bank.

III. Inconsistency 


Recently Apple has had a lot of trouble with consistency. The current array of products are scattered and are extremely varied, a far cry from the simple 2012 line-up.

3.5mm Headphone Jack:

The headphone jack removal has been one of the messiest removals by Apple so far. During the September iPhone 7 event they preached the removal of the headphone jack was equivalent to the removal of the DVD drive and the switch from floppy disks, and that this move would take courage. However, they have not committed in any way to the complete removal from their line-up and have released a new generation of MacBooks, the largest upgrade in 4 years, and have retained the universal standard. To be clear, I'm not at all upset about this choice, but it shows their uncertainty with their move to new connectors.

Growing divide between Macs and iOS:

iOS 10 features like stickers and message effects cannot be sent from Macs and don't function properly cross-platform and macOS Sierra was one of the smallest feature releases in OS X history. Siri has been poorly integrated and timers aren't even able to be set in macOS. Although the Mac software from Apple seems to be lacking, the hardware divide has grown exponentially. As explained earlier in part II, the iPhone 7 can't even be charged by a new MacBook without an adapter for USB-C and the new headphones are unusable with any Mac.

The traditional USB make this laptop look like it is from an entirely different decade.
Growing divide from Mac to Mac:

The MacBook Air 13-inch has no USB-C/Thunderbolt 3 port. In comparison to the other two MacBook models it appears ancient and has only received minor hardware upgrades since its inception in 2008. A consumer is most likely going to be very confused by this transition.

No desktop Mac, like the iMac, Mac Pro, or Mac Mini, have Thunderbolt 3 or USB-C. 

Without universal USB-C support on Macs there is almost no way it will become widely used in the Apple ecosystem.

In Conclusion:


Apple could fix a lot of these issues. First, remove the headphone jack from the portable MacBooks and include an adapter in-box like the iPhone 7. Second, use USB-C on the iOS devices or add a Thunderbolt connector to the Mac lineup. Third, update macOS with, at least, the features of iOS. Finally, match the MacBook colors to the current iPhone color choices. Add a matte black, rose gold, and gold color choice to the Pro selection. I hope to see these improvements coming in the near future, but for now, the array of products offered by Apple is completely scattered and at one of the most awkward junctions in technology in modern computing.

Also, please drop the base price of the MacBook Pro with Touch Bar and Touch ID to $1,299 please.


Share This:    Facebook Twitter Google

Saturday, September 17, 2016

iPhone 10th Anniversary Concept

The 10th anniversary of the original iPhone will occur next year and a lot of rumors and speculation surrounding a new model has arisen. Most people believe it will come in the form of an iPhone 8 total redesign, completely shattering expectations, however, I believe that a better idea would be to release a 10th anniversary model edition of the iPhone 7 that maintains the design of the original. It would have a metal bottom bar similar to the plastic antenna cover of the original one. The base sizes would be 128GB and 256GB instead of starting at 32GB. I would love for these to be marketed in every store, however, I believe the most likely scenario with an anniversary model would be a limited supply model. The model above maintains the shape and design of the traditional iPhone 7, however, it features the original set of iOS wallpapers. 


iPhone 2G as a comparison (Apple)


Share This:    Facebook Twitter Google

Sunday, September 11, 2016

How to Install macOS Sierra on a Hackintosh

Hackintosh: How to Install macOS Sierra on a Hackintosh


Here are the things you'll need (I recommend you save them in a folder on your desktop):
  • A genuine Mac
  • macOS Sierra Installer | App Store
  • EFI Mounter v3 | Link
  • Latest version of Clover | Link
  • FakeSMC.kext | Link
  • An 16GB or more USB


1) First you're going to want to use a tool in Terminal called "createinstallmedia" to make your USB drive. Assuming the Install macOS Sierra.app is in your Applications folder, run this command in Terminal (replacing where necessary, I'd recommend copying and pasting, and then going back and editing):


sudo /Applications/Install\ macOS\ Sierra.app/Contents/Resources/createinstallmedia --applicationpath /Applications/Install\ macOS\ Sierra.app --volume /Volumes/{USB name here}

This could be anywhere between 10 and 30 minutes, but could be more or less depending on your setup. When the process is completed, you will be able to type in Terminal again.

2) Now run the Clover package. Select the USB as your destination, click Customize and use the following options: "Install for UEFI motherboards" then, under Drivers64UEFI, select "OsxAptioFixDrv-64" and "PartitionDxe-64".


3) Mount the EFI partition of your flash drive using EFI Mounter v3 | Link

It will prompt you to enter your password, do so and press ok. A list of mounting points should appear. disk0s1 is your main drive. Choose the USB drive, mine was disk2s1.


Scroll down and click the USB drive
Now press mount.

4) Place FakeSMC.kext and any kexts you need into /EFI/CLOVER/kexts/Other.

4) Now boot from your USB! 

DIDN'T BOOT?: Make sure you're using a USB 2.0 port and your flash drive is 16 GB or higher. You probably will have to configure your BIOS.


SUGGESTED: How to access the boot menu – Explanation of what each boot flag is and does and how to use them.


Use the kext-dev-mode=1 and rootless=0 bootflags and add -v to the end of the boot flags so you can get an output of what's going on (verbose mode).

5) Get into the installer, and then install macOS Sierra to your HDD or SSD.


6) When the install completes, reboot, boot from the USB and this time select your main boot drive that you just installed Sierra onto. Use the kext-dev-mode=1 -v and rootless=0 bootflags once again. 


SUGGESTED: Hackintosh Boot Flags – Explanation of what each boot flag is and does and how to use them.


7) Install Clover to your boot drive.

7) Copy the FakeSMC.kext and your network kext across to the EFI partition on your hard drive. The rest depends on your system, you may need to download some more kexts and drivers, you may now be good to go. Good luck!


Beta NVIDIA web drivers are available for macOS Sierra here. Official drivers should be released in the coming weeks.

If you have any issues installing, leave a comment!
Share This:    Facebook Twitter Google

Friday, August 12, 2016

#OrderOf10 Challenge Answers

UPDATE: The new challenge answers are now available! Comment if you solve it!

Order Of 10 Challenge Answers

   In preparation for the launch of their new Pascal GPUs, NVIDIA has created a group of challenges for users to complete to be entered to win a GTX 1080 when it is released.

LINK TO THE CHALLENGES: orderof10.com

Order Of 10: Origins Answers

Challenge 1: Ouroboros
Challenge 2: Syracuse
Challenge 3: Astronomical Unit
Challenge 4: E

Originally posted 5/19/2016:

Classic #OrderOf10 Answers

Day 1: Evolve
Day 2: Ubiquitous Patterns
Day 3: Innovate
Day 4: Metagenesis
Day 5: Sea Change
Day 6: Trinity
Day 7: 1.52
Day 8: Infinite Energy
Day 9: Infinite Realities
Day 10: Inspiration


Thank you for everyone who contributed!

IF YOU COME HERE BEFORE THE ANSWER IS POSTED, READ THE COMMENTS!
If you find the answer, let me know! 


Share This:    Facebook Twitter Google

Wednesday, August 3, 2016

Concept: The Nintendo NX running Android

I've drafted a concept of a future Nintendo console running Android and being portable. Android, already having extensive developer support and proper maintenance, has quality 3rd party apps and games available. Nintendo could filter the availability through the eShop, their app store. Wii U titles are available alongside new games built for the NVIDIA Tegra chip. Titles such as Miitoto and Pokemon GO are avaliable.
The home screen with search and notifications to the left.
Calls are minimized (and can be hidden) in the bottom right.

Quick settings alongside the account switcher and Nintendo dialer/voice chat app. The menu buttons are available on a swipe up or press of the Start button.

Alternate home screen.


Share This:    Facebook Twitter Google

Thursday, July 7, 2016

How to Install iOS 10 Public Beta and macOS Sierra

iOS 10 Public Beta Installation

I recommend backing up your device with a Mac or PC before installing the iOS 10 Public Beta, however, it is not required.

On your iOS Device

1. Visit beta.apple.com/profile and install it by following on-screen instructions.
2. Check for updates
3. iOS devices running iOS 8.1.3 or later will automatically receive the latest public beta software over the air. Tap Settings > General > Software Update to install any available beta software.

macOS Sierra Public Beta Installation

1. Visit beta.apple.com and log in with your Apple ID
2. Scroll down to Step 2 on the macOS Sierra public beta webpage. Copy your redemption code and click "Redeem Code"


3. Enter the redemption code in the Mac App Store window that appears and click "Redeem"
4. Check the Updates tab in the App Store and it should appear.
Share This:    Facebook Twitter Google

Wednesday, July 6, 2016

Apple Rundown (July 2016)

Rundown of Apple Inc.

 As of July 6, 2016, Apple Inc. is one of the largest companies in the world valued at 724,773.1 million dollars. Their product lines include OS X, iOS, iPhones, iPads, Apple Watches, iPods, Macs, Macbooks, and more. What makes this incredible is that they have developed the operating system and much of the software on every device they sell. Here is my current Apple Inc. rundown.

Share This:    Facebook Twitter Google

Tuesday, July 5, 2016

iOS 10 Beta 2's New Features


iOS 10 Beta 2 New Features

All of the new features in iOS 10 Beta 2.
  • Tweaked HomeKit iconography in Control Center
  • Notification Center ‘Missed’ becomes ‘Recent’
  • Today view for widgets in Notification Center can once again be accessed with swipe down from Home screen, not just within apps
  • Iconography for Apple TV and speakers tweaked in AirPlay settings in Control Center
  • HomeKit app icon updated from solid yellow to Home app icon in Settings
  • Apple Music replaces ‘Downloaded Music’ with ‘Downloads’, no longer removable
  • Maps now includes option for ‘Show Parked Location’ plus feature explanation in Settings
  • Messages now has Low Quality Image Mode toggle in Settings
  • Mail has new filter icon (was previously a filter, now lines within a circle
  • Notification Center now has Weather Channel credit once again
  • Control Center 3D Touch options have tweaked language, icons
  • New Organ Donation changes available in Health app
  • Music now has Shuffle option from Songs section (previously had to play a song before shuffling)
  • ‘Rest Finger to Unlock’ option in Accessibility Settings
  • Lock screen adds ‘Unlocked’ animation in status bar when unlocked, previously just removed lock icon
  • App Store now works with Split View on iPad Pro
  • iMessage App Store introduced over the weekend now promoted with splash screen
  • Feedback app available for more users
  • 3D Touching folders with badges now shows badges per apps, previously said ‘Unread’ per app
  • Interactive notifications now work differently on non-3D Touch devices (swipe down versus slide over to access options)
All of the removable Apple apps:

Removing an Apple application from the home screen does not remove it from the device.

Calculator, Calendar, Compass, Contacts, FaceTime, Find My Friends, Home, iBooks, iCloud Drive, iTunes Store, Mail, *Maps, *Music, News, Notes, *Podcasts, Reminders, Stocks, Tips, Videos
  • You can remove the Contacts app from an iPhone only. If you remove Contacts, you won’t lose your contact information. You can still find all of that information in the Phone app.
  • If you remove the Music app, it won’t be available to use with CarPlay.
  • If you try to remove the Watch app from an iPhone that’s paired with an Apple Watch, an alert asks you to unpair your Apple Watch before you can remove the app. 

OTA Profiles - (Install on-device)

iOS 9.3.3 should be arriving within this week, but while we wait for a new public release, iOS 10 Developer Beta 2 is great news for developers!
Share This:    Facebook Twitter Google

Monday, July 4, 2016

Friday, July 1, 2016

iOS 10 Jailbreak from Pangu Demoed at MOSEC

The One More Thing announcement.
During the MOSEC iOS security conference Pangu, a well-known and trusted jailbreak developing team, has demoed an iOS 10 untethered jailbreak. Rumors surrounding an upcoming iOS 9.3.2 release later this week is growing, and most likely will arrive right after iOS 9.3.3 is released. Because there is little to report on surrounding these photos, and the lack of any source besides them, we caution everyone to not expect too much from Pangu as far as realeases, as an iOS 9.3.2 jailbreak has not been presented and iOS 9.3.3 is right around the corner.

Cydia is present on a jailbroken iOS 10 Developer Beta 1 
The package manager within Cydia functions on iOS 10
iExplorer is able to detect the device as jailbroken

Once again displaying that Cydia is present in iOS 10

Share This:    Facebook Twitter Google

Thursday, June 30, 2016

Android N revealed to be Nougat


The Android team announced on their Twitter today that Android 7.0 will be named Nougat. This will most likely have no effect on the development, as previous naming choices have not, besides the Settings app Easter egg included in every version of Android to date.
Introducing #AndroidNougat. Thank you, world, for all your sweet name ideas! #AndroidNReveal pic.twitter.com/7lIfDBwyBE— Android (@Android) June 30, 2016 
In related news to this announcement, the final update this fall might include a different navigation bar design. From inside the Android N's developer preview's files a new solid icon navigation bar design was spotted. Confirmation as to whether it will be included in the final version is up in the air at the moment.

Android Nougat navigation bar
Android Marshmallow navigation bar

Share This:    Facebook Twitter Google

Wednesday, June 29, 2016

Disable Gatekeeper in macOS Sierra

On macOS Sierra, the option to allow apps downloaded from anywhere is disabled. It is not visible from System Preferences at the moment (of course, it is Developer Beta 1, so this may change) so the only way to activate it is through Terminal.

1. Open Terminal
2. In Terminal, enter or copy:

sudo spctl --master-disable

3. Type your password (it will not appear, however it is present)
4. It is complete!

Default macOS Sierra settings available 
After entering the command in Terminal


Share This:    Facebook Twitter Google

Tuesday, June 28, 2016

Windows 10 Offer now has the option to be declined


The Windows 10 offer has been updated to include a "Decline free offer" option. Originally, the Windows 10 pop-up only had two options, Upgrade Now and Close. Although it seemed to declined when close was clicked, the upgrade continued to pursue the user and, in many cases, installed against the user's will. 

This may be due to a lawsuit in which Microsoft paid $10,000 to a Florida woman because her Windows computer had attempted, and failed, to upgrade to Windows 10. “I had never heard of Windows 10,” Goldstein said, “Nobody ever asked me if I wanted to update.” The court ruled that it although the end user license agreement (EULA) made the user agree to unapproved updates it was not legally binding and caused her damage. 

This is a step forward for Microsoft in acknowledging the end-user's rights. The deadline for the Windows 10 free upgrade from Windows 7, 8, and 8.1 is July 29, 2016, so any user interested must do so before that date.

Share This:    Facebook Twitter Google